To create a class blog, a faculty member would complete the steps for Setting up class blogs.
Adding Users
The site owner (or class blog faculty member) should ask users (students) to create or confirm their Voices account BEFORE adding them to the site. For directions on creating a Voices account, see Setting up class blogs [on Voices support] or WordPress (Blogs) for Classroom and Personal use [on Technology@Wooster’s KnowledgeBase].
Once the class blog is created and the users have confirmed their Voices accounts, from the Dashboard:
- Activate the Add Existing Users plugin on the Plugins page (already activated if using one of the course site templates).

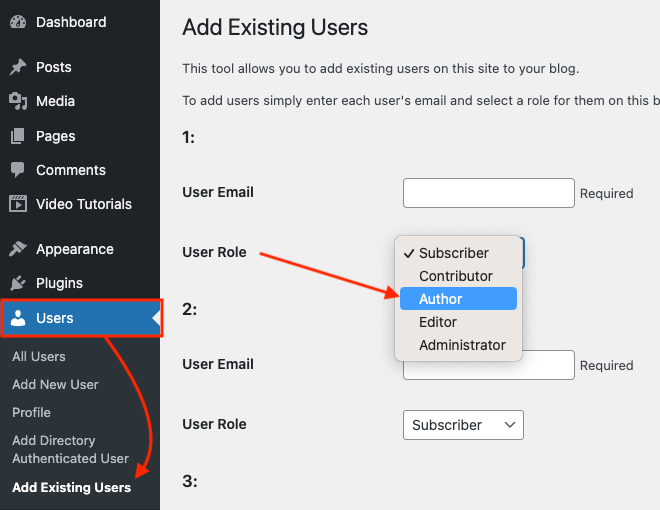
- Click on the Users panel and select Add Existing Users.
- Enter up to 15 student email addresses in the available fields and select the role of each student (the “Author” role should be what is selected for most students).

- Select the Submit button at the bottom of the page.
- Users will receive an email invitation with a link to the blog. Each user must follow the link in order to enroll them as users in the site.
- At this point all of your students will be able to write posts on the class blog.
The All Users pane
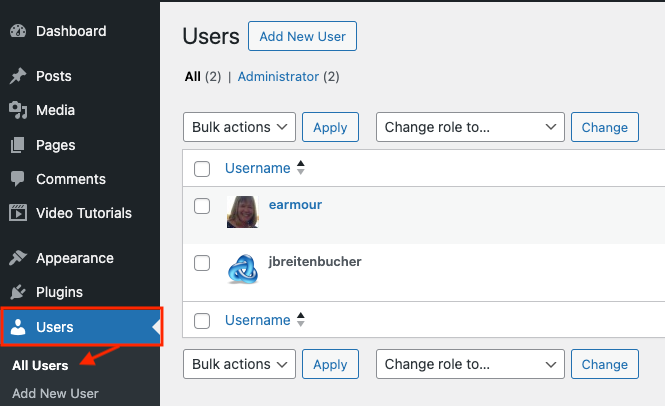
From the Users pane, visit All Users to see a list of users and their roles.
To change a user’s role:
- From the Dashboard, visit the Users pane and select All Users.
- Click the checkbox to select a user and from the Change role to… menu, choose a different role.
- Click the Change button.

Removing Users
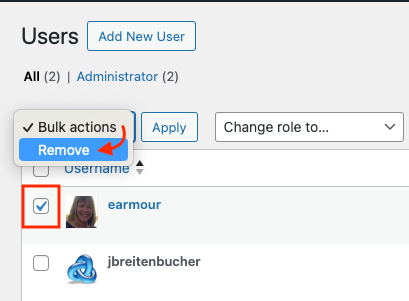
- From the Dashboard, visit the Users pane and select All Users.
- Click the checkbox to select a user and from the Bulk actions menu, choose Remove.
- Click the Confirm removal button.
