See our KnowledgeBase article Voices: WordPress at Wooster on Technology@Wooster site for detailed directions.
Generally faculty have created three types of class blogs:
- course information site (no student blogging),
- class blog (all students added as Authors to the course site),
- course site with student blogs (students each have their own blog and their posts are fed into the course site).
Let’s walk through how to create your account, create each type of site, and add students.
Faculty: Creating a Voices Account and a Course Site/Blog
You have two choices for your account:
- Create a separate Voices account so that your username and password are not connected to your College credentials (and your password doesn’t change).
- Use your College username and password (your Voices password will change when your College Microsoft 365/Outlook email password changes).
To create a Voices account (not connected to your College account) and a course site/blog
- Go to http://voices.wooster.edu/
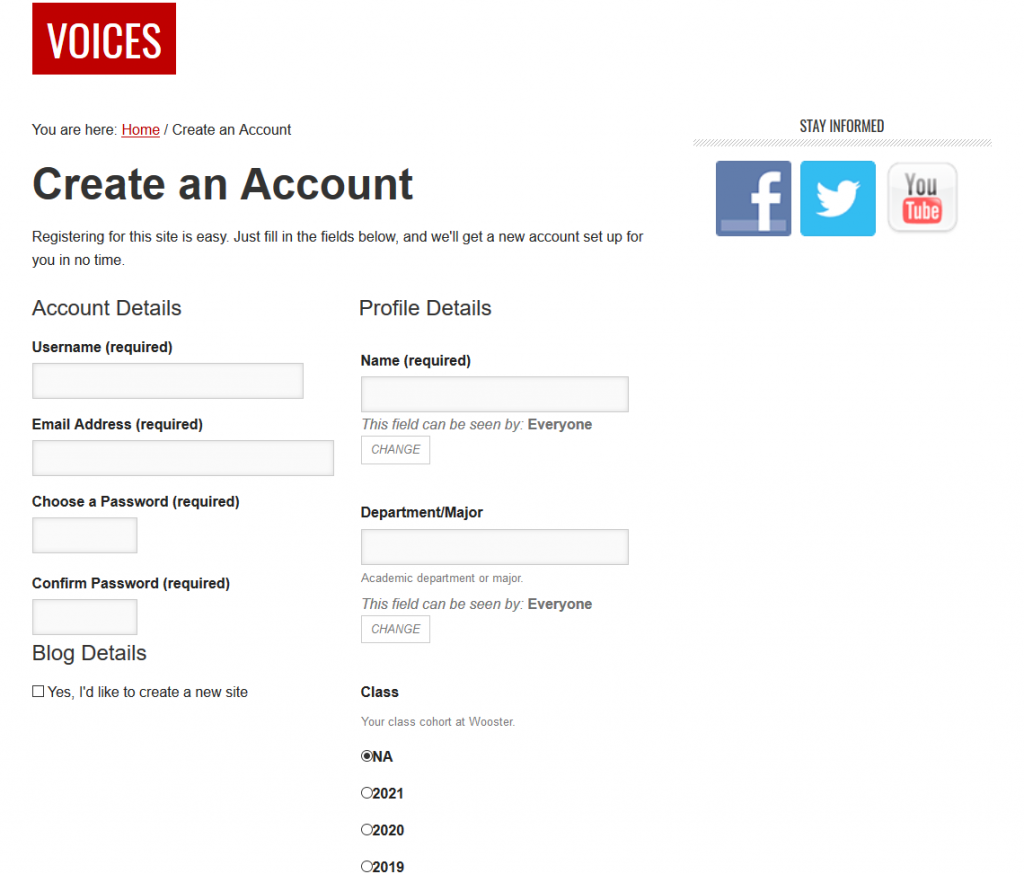
- Click the “Register” link in the upper left corner on the toolbar.

- Fill in the following information:
- Username: This will be your username for the voices.wooster.edu blogging site. It does not need to be the same as your Wooster username.
- Email Address: This must be an @wooster.edu email address
- Password: This will be your password for the voices.wooster.edu blogging site. It will not sync with your Wooster password and will not change when you change your Wooster password.
- Name: Your Name
- Dept/Major: These are optional
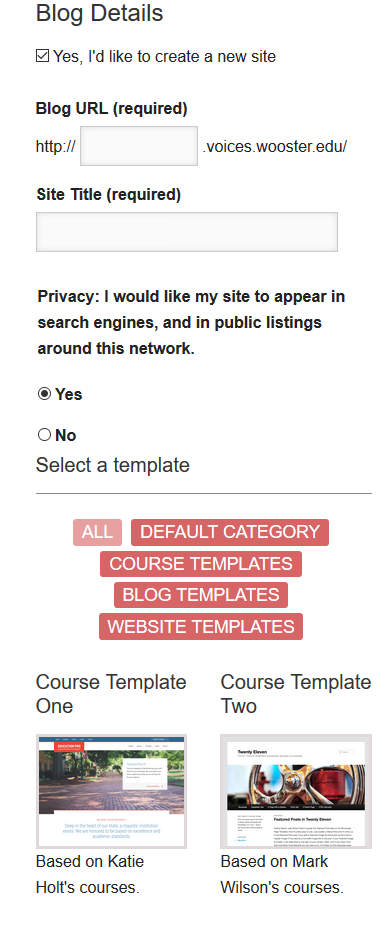
- Yes I’d like to create a new blog: Select this button if you would like a blog.
- Site Domain: The text you type in this box will be the* *Blog URL followed by “.voices.wooster.edu” to act as the web address for your blog. For example, if “mycourse” were typed into this box, the address for your blog would be http://mycourse.voices.wooster.edu.
- Site Title: This is the name of your blog and will be displayed at the top of your blog pages. It can be changed later along with a tagline.
- Privacy: I would like my site to appear in search engines, and in public listings around this site: It’s a good idea to have search engines index your blog. This helps protect you by archiving your work in case of a severe issue with your blog occurs. If privacy is a must, then check “No”.
- Select a template: If you are creating a course site, consider selecting a Course template. Otherwise, choose either the Blog or Website template.

- Once you have completed these steps, click “Complete Sign Up.”
An email will be sent to your Wooster email account with a link to activate your Voices account. Follow the link and then click log in from the navigation bar at the top of the screen (see below) or use the login widget in the right sidebar.
To use your College username and password for your Voices account and create a course site/blog
- Go to http://voices.wooster.edu/
- Click the “Log in” link in the upper left corner on the toolbar.
- Login with your College username and password. Your Voices account is synced with your Wooster credentials and your password will change when your Wooster Office 365/Outlook password changes.
- In the upper left corner, click “My Sites.”
- Click the “Add New” button.

- Enter information for the following fields:
- Site Domain: The text you type in this box will be the* *Blog URL followed by “.voices.wooster.edu” to act as the web address for your blog. For example, if “mycourse” were typed into this box, the address for your blog would be http://mycourse.voices.wooster.edu.
- Site Title: This is the name of your blog and will be displayed at the top of your blog pages. It can be changed later along with a tagline.
- Privacy: I would like my site to appear in search engines, and in public listings around this site: It’s a good idea to have search engines index your blog. This helps protect you by archiving your work in case of a severe issue with your blog occurs. If privacy is a must, then check “No”.
- Select a template: If you are creating a course site, consider selecting a Course template. Otherwise, choose either the Blog or Website template.
7. Once you have completed these steps, click “Create Site.”
Adding students to a class blog
See the Adding users to your site (or removing them) page for details.
Creating a class blog where each student has a blog
- The faculty member needs to complete the steps for Creating a course site and Creating a class blog.
- Each student will need to complete the steps for Creating a Voices account and a blog.
- The faculty member will need to enable the FeedWordPress plugin.
- The faculty member will then need to add the URLs for each of the student blogs into the FeedWordPress plugin’s settings. The FeedWordPress plugin will pull the posts from each student blog and post them on the class blog. Until a screencast of enabling and configuring these two plugins is completed, faculty should feel free to contact the Educational Technology for help.